Add an asset account
When you add a new account, Quicken adds it to the Account List (choose Tools menu > Account List). In most cases, you'll want to add all of your household's accounts in the same Quicken data file, so that you can track all your finances in one place.
Click the Add Account icon on the top right of the Account Bar
 .
.Click Other Assets & Liabilities.
Click Non-cash assets, any high value property.
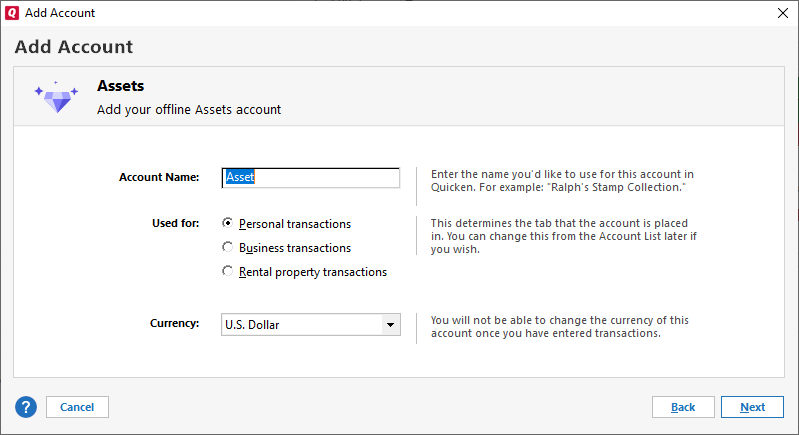
On the Asset screen, enter the following:
An Account Name for the asset.
Select what the account will be used for (usually Personal transactions).
Select the Currency (Usually U.S. Dollar)

Click Next.
Enter the Date to start tracking, generally the last statement date or date of the last appraisal.
Enter the Asset Value (price as of the Date to start tracking.
If this is a tax-deferred account, you can either accept the default tax attributes or click Enter Optional tax information to link tax schedule line items to the transfers into and out of the account.
Click Next.
If there is a loan on the asset, choose a method to track the loan, otherwise select No.
Set up a new account in Quicken (You will be guided through the account setup process).
Already Tracking: Select an existing account in Quicken (select an account from the menu).
I do not want to track the loan in Quicken (The loan won't be tracked).
Click Next.
Click Finish or Add Another Account.
