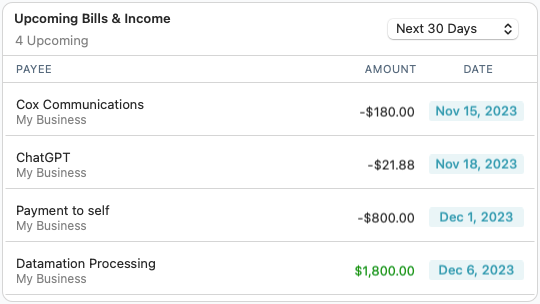
Upcoming Bills & Income
The Upcoming Bills & Income feature is a crucial component of the Business Dashboard. This tool empowers you to stay meticulously organized and never miss a payment by providing a clear view of your upcoming bills and expected income. In this topic, we'll walk you through the ins and outs of Upcoming Bills & Income, ensuring you make the most of this feature.

Adding a scheduled transaction
The Upcoming Bills & Income card is for tracking scheduled transactions, you cannot use the card to schedule transactions. To do that, you should go to your Transactions and schedule to the transaction from there. Here's how to do it.
- Go to the sidebar and select the account you want to add the transaction from. Usually, this will be one of your business accounts, but you can also use a personal account if necessary. See Primary use for more information on this.
- The transactions register will open on the main screen for that account. Identify the transaction you want to add to your schedule.
- Control-click on the transaction and choose Schedule Selected Transaction. The Schedule Bill Reminder screen will appear.
- Choose the Frequency. Most bills are monthly so that's the default, but we have a whole range of choices such as Quarterly, Yearly, or even a special one called To pay estimated taxes that we set up for self-employed people to make sure they pay their estimated taxes on time.
- Your other schedule choices will change depending on the Frequency. For example, if you have a Weekly payment, we base it on the day of the week. No matter what frequency you choose, there will be a Summary next to it to help guide you and give you a review of the Next 5 Payments.
- There is also a Details tab (Select it at the top of the page). You can use that to add optional details. You'll find that much of it is already filled out based on the information in your transaction, but you can add things such as Website (of who you are paying), Tags, and Memo.
If you want more information about scheduling transactions, see the topic Create new scheduled transactions.
