
You can create an estimate to list goods or services you might provide to a prospective customer. Since an estimate is not a confirmed sale, it does not affect your income or financial records. There is no guarantee that the transaction will be completed. Once a customer accepts an estimate, you can modify it if needed and convert it into an invoice. The invoice appears in the selected account with the next sequential invoice number and then affects your income records.
You can also create an invoice directly without an estimate to bill customers for products or services.
Understanding estimates vs. invoices
Estimates and invoices serve different purposes in managing business transactions. Understanding their distinctions ensures proper financial tracking and customer communication.
-
Estimates: These are preliminary documents provided to customers outlining the anticipated cost of goods or services before committing to a sale. Estimates help set expectations and serve as a reference for potential transactions. Since they are not finalized sales, they do not impact financial records or income statements.
-
Invoices: These are formal requests for payment once goods or services have been provided. Invoices contain finalized transaction details, including due dates and payment instructions. Once issued, they are recorded in financial accounts as income, affecting overall business reporting and taxatio
How to create an estimate or invoice
Step 1: Access the Estimates and Invoices menu
-
Go to the Business tab.
-
Select Business Actions > Invoices and Estimates.
-
Choose an option:
-
Create Estimate to provide a potential cost for goods or services before confirming a sale.
-
Create Invoice to bill customers for goods or services provided.
-
Step 2: Enter customer and project information
-
In the Customer field, enter or select the customer’s name.
-
The first time you enter a name, Quicken memorizes it for future use.
-
If you have a long customer list, use the search function to find the correct name quickly.
-
-
(Optional) In the Project/Job field, enter or select a project or job name.
-
If entering a project or job for the first time, complete the New Project/Job dialog.
-
Closed projects or jobs do not appear in the list.
-
Ensure that the project name is accurate, as it helps track related invoices.
-
Step 3: Customize invoice details
-
In the Layout list, select a layout or select Customize to design a new one using Forms Designer.
-
If you frequently use a specific layout, set it as the default to save time.
-
-
In the Business Tag list, select a tag associated with a business.
-
If using business tags at the invoice item level, leave the Business Tag field blank.
-
Business tags help categorize invoices for reporting and analysis.
-
-
Enter the billing and shipping addresses.
-
Double-check the accuracy of addresses to avoid delivery errors.
-
-
If needed, adjust the invoice date and due date.
-
The default due date is the invoice date plus 30 days.
-
If your business has specific payment terms, ensure they align with your agreements.
-
Step 4: Add line items and finalize invoice
-
(Optional) In the P.O. Number field, enter the customer’s purchase order number.
-
This helps match the invoice with the customer's internal records.
-
-
In the Item field, select or add an invoice item.
-
If the item is not listed, enter a new name and select Yes to add it.
-
If taxable, Quicken displays a T in the Taxable column.
-
Ensure that item descriptions are clear for accurate billing.
-
-
In the QTY field, enter the quantity. The Amount column updates automatically.
-
Verify quantities and prices before finalizing to avoid discrepancies.
-
-
(Optional) Add web links (PayPal, Yelp, directions) by selecting Insert Web Links.
-
PayPal links require a PayPal Business account.
-
Yelp and directions links can help customers locate your business or leave reviews.
-
You can add multiple links by selecting the checkboxes next to each.
-
-
(Optional) In the Customer Message field, enter or select a message.
-
Use this field to include payment terms, thank-you notes, or additional instructions.
-
-
Enter the tax rate in the Tax field (for example, 8.25 for 8.25%).
-
Ensure that tax rates comply with local regulations.
-
-
Select Save and New to create another estimate or invoice, or Save and Done to finish.
How to edit an estimate
-
Go to the Business tab.
-
Select Business Tools > Estimate List.
-
Select an estimate and select Edit.
-
Make changes as needed.
-
Double-check modifications to ensure accuracy before saving.
-
-
Select Save and Done.
How to edit an invoice
-
Open the account where invoices are tracked.
-
Select the invoice transaction and double-click --Form-- in the Category field.
-
In the Invoice dialog, make changes as needed.
-
Ensure that any changes reflect agreements with the customer.
-
-
Select Save and Done.
Notes:
-
Use Forms Designer to customize fields, columns, layout, and company branding.
-
Set default due dates and customer contact information to save time.
-
Recurring invoices can save time for repeat customers. To copy an invoice for recurring use, select the invoice, go to Edit > Copy Transaction, then Paste Transaction, and modify as needed.
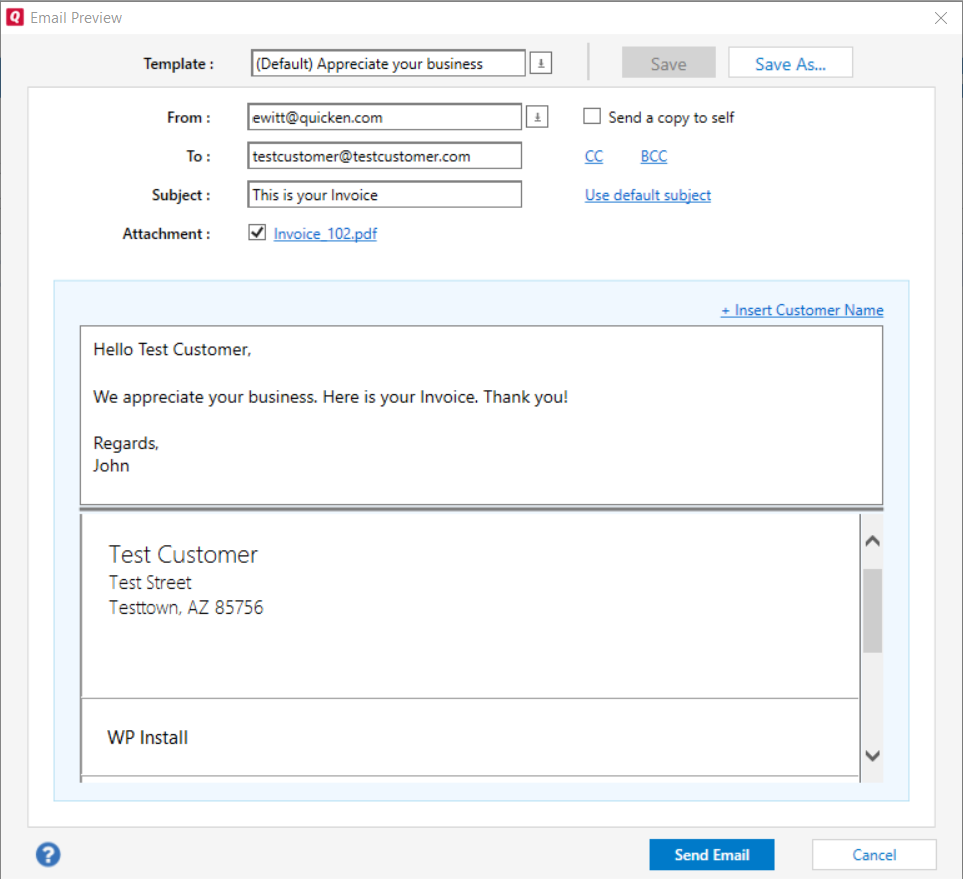
How to add a customized email
-
Create an invoice or estimate.
-
Select Email. The Email Preview window opens.
-
Customize the email, including From, To, Subject, and message text (maximum 500 characters).
-
Keep emails concise and professional.
-
-
(Optional) Select Save As to save a reusable email template.
-
If you frequently send similar emails, saving a template can improve efficiency.
-
-
Select Send Email to send the invoice or estimate.
This feature requires Quicken Business & Personal. Learn how you can upgrade Quicken in minutes.