Using reconcile
You can reconcile directly within your account register.
Select the account you want to reconcile from the sidebar.
Click the Reconcile icon on the lower right side of the register action bar.

You can also go to Quicken > Accounts > Reconcile Account. The reconcile window displays all your transactions in the selected register, with the Clr column.
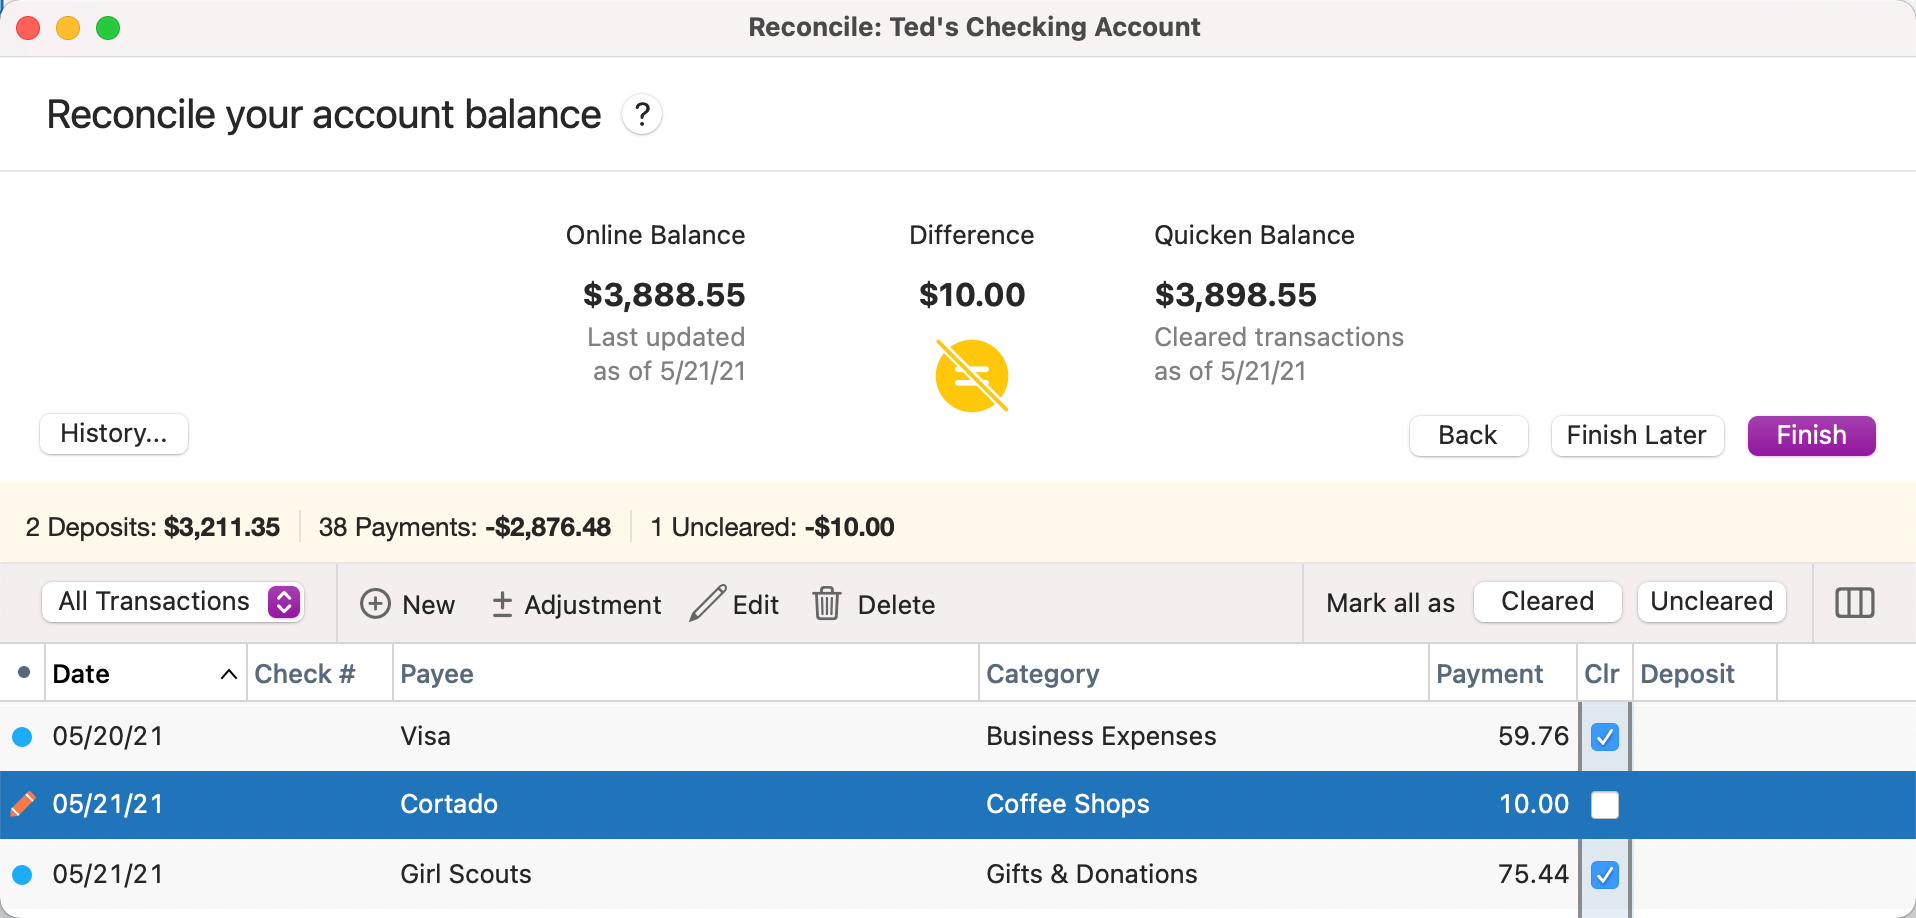
Reconcile consists of two steps. The first step is to choose whether you want to reconcile against an online balance or a statement balance. The second step is to clear transactions against your bank. Quicken helps you do the math to calculate whether your balance is on target or not.
Step 1
Choose whether to reconcile against an online balance or a statement balance.

Reconcile against an online balance
If the account is set up for downloads
Make sure that Use Online Balance is selected.
If the date of the last download shown is recent, go to step 3. If you want a more recent download, click the Update Balance button.
Click Next. Your reconciliation information will appear.

If the account is not set up for downloads but you want to use a balance from the bank
Select Use Online Balance.
Enter the account balance that you obtained from the bank via their website or telephone access into the Online Balance field.

Click Next.
Reconcile against a paper statement
If you plan to use a paper statement
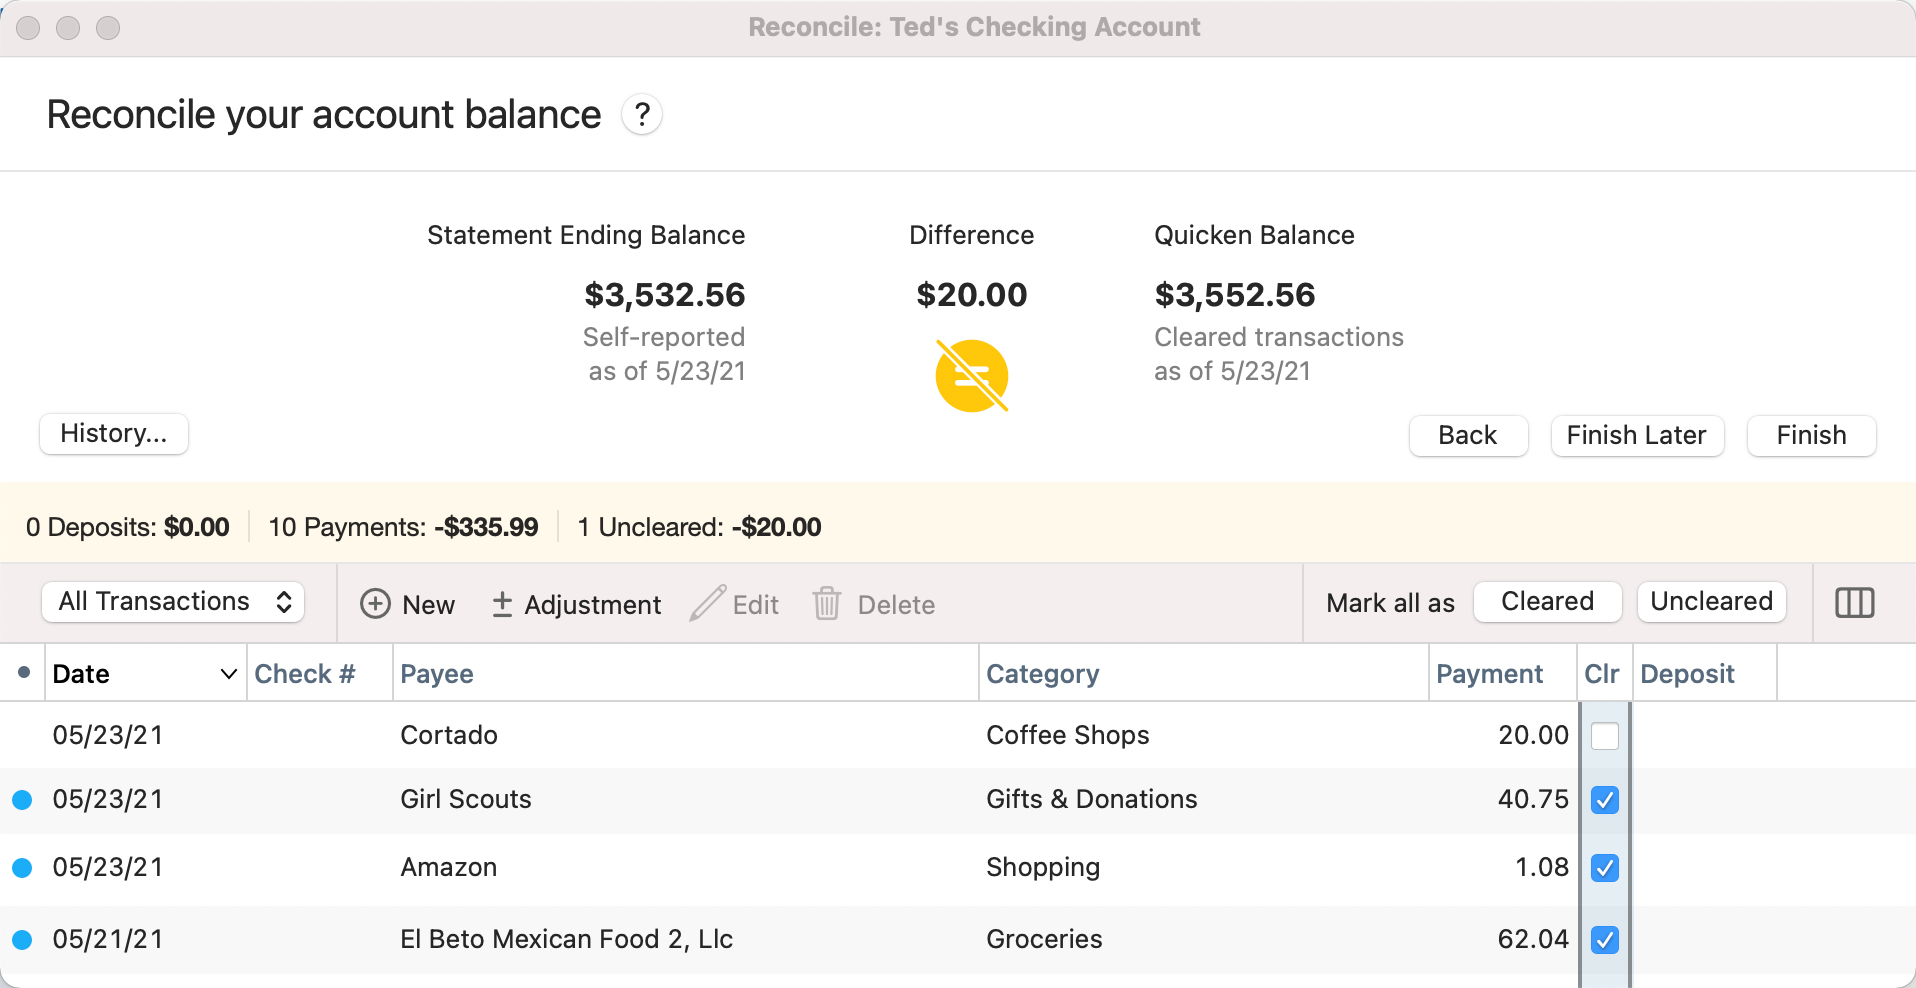
Select Use statement balance.
Enter the Ending Balance from your statement.

Click Next.
Step 2
Clear transactions and make adjustments
After you click Next, you'll be presented with a new view that calculates the balance of your cleared transactions as you check them off.
Start reconciling by reviewing and comparing the transactions entered in Quicken with the transactions listed in your bank statement.
Make adjustments wherever required. If you entered an incorrect amount, such as a donation for $40.75 that should have been for 60.75.
In the Clr column, select the checkbox for the transactions that match your bank statement. By default, the downloaded transactions will be checked.
Note: The Reconcile screen includes a History button. Selecting History will bring up a screen with your past reconciliation attempts. This can be very handy for identifying issues. See Using Reconciliation History to fix a previous reconciliation for more information.
Your goal is for the difference to be 0 (zero), but there are times when the amount may not be zero.
If the difference between your Statement Ending Balance and your Quicken Balance is 0 (zero) select Finish. Your account is reconciled.
Note: If you are reconciling a credit card account, the ending balance should equal what is currently owed.If the difference between your Statement Ending Balance and your Quicken Balance is not 0 (zero) select Finish or Finish Later.
If you select Finish Later the reconcile screen will close. You can revisit it later using the Reconcile button.
If you select Finish and your account is not reconciled, you will be prompted to either Finish Later or Add Adjustment. If you select Add Adjustment tan adjustment transaction with a payee of Reconcile Adjustment will be added with an amount that will bring your register difference to 0 (zero).
Please note that these steps assume that you reconciled successfully in the previous reconciliation period. The reason you must have reconciled previous months first is that the starting balance, which is the sum of your reconciled transactions, must equal the bank’s sum of all transactions up to but not including the current period.
