
Welcome to our guide on moving your business data from Windows to Mac! Let's walk through how our software makes this transition as smooth as possible. Transitioning from Windows to Mac needs some preparation, especially with business data. It's a good idea to revisit this guide as you make the shift.
Before you Migrate
Here are a few steps to take before you migrate:
-
Determine how far back you want to go. The more years of data you move, the more work it will be. If you still plan to maintain and update your Quicken for Windows file, you may want to start fresh on the Mac or only keep the past year’s worth of data.
-
Make sure you are on the latest version of Quicken for Windows. In Quicken for Windows, you can check for updates by going to the Help menu and selecting Check for updates.
-
Review your business transactions to ensure they have Business Category and a Business Tag assigned. Pay close attention to any split transactions, especially transactions that may include both business and personal transactions or multiple businesses.
-
Quicken for Mac uses a Business field, rather than tag(s) to identify business transactions.
-
Business tags in Quicken for Windows will be imported into Quicken for Mac as Business entities.
-
Quicken for Mac will attempt to set the appropriate Business Type for imported Businesses based on historical category usage. For example, if you use categories associated with Schedule C tax data, Quicken for Mac will set the Business Type to Schedule C. You can always change this.
-
-
Review the Primary Use for imported Business accounts. For most accounts associated with your business, you will want to verify that Business is identified as the account’s primary purpose. For more information, see Primary Use: Business vs. Personal.
Migration Steps
To migrate your file you must first export from Quicken for Windows, copy the file to your Mac, and then load the file into Quicken for Mac.
Export from Quicken for Windows
This must be done in your Windows version of Quicken.
-
Choose File menu > File Export > Quicken Transfer Format (.QXF) File.
-
In the QXF export dialog, accept or change the name of the file to be created.
-
Click OK to create the QXF file. A confirmation message displays when the process completes.
-
Transfer your file to your Mac. You can do this in many ways. If you are using Quicken's free Dropbox subscription, just move the file to the Dropbox Directory in Windows, then access it again from your Dropbox account on the Mac.
Import into Quicken for Mac
This must be done in Quicken for Mac. The best practive is to use a recently created Quicken file. This avoids issues such as duplicate accounts.
-
Choose File menu > File Import > Quicken Windows File.
-
Select the QXF file you want to import.
-
Select Open.
-
Follow any additional instructions.
Next Steps
Set a business account
When you import a file from Windows, the accounts are all listed as Personal. If you have one or more accounts that are primarily for business, you will want to set Business as the account's primary purpose. For more information, see Primary Use: Business vs. Personal.
Migrate Business Categories
Use the steps below to migrate your business categories.
Keeping categories consistent
A main category and its smaller categories should match in type. For example, if a category is a "business expense," all its smaller ones should be too. There is no need to adjust each one — change the main one, and the rest will follow suit.
-
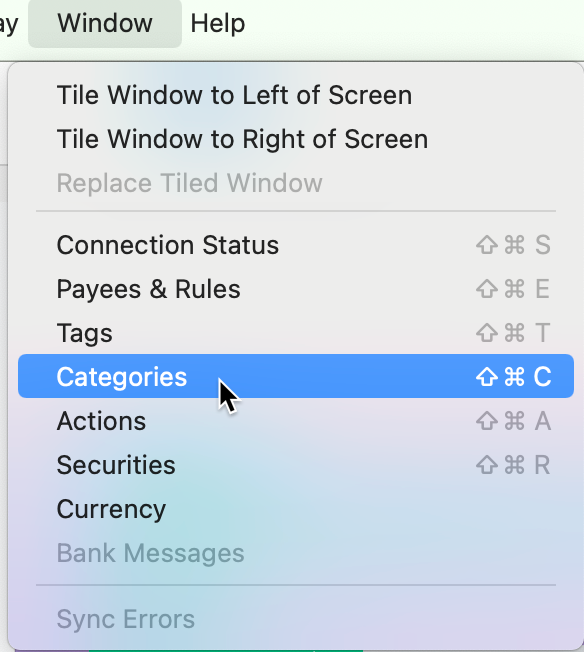
Go to the Window menu and select Categories.
-
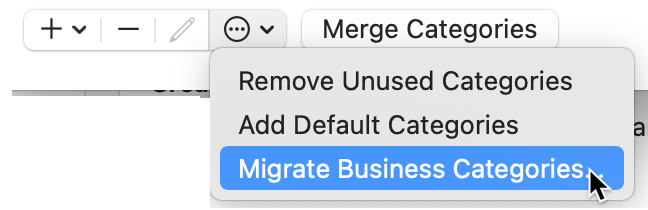
Go to the three-dot menu at the bottom of the screen and select Migrate Business Categories.
-
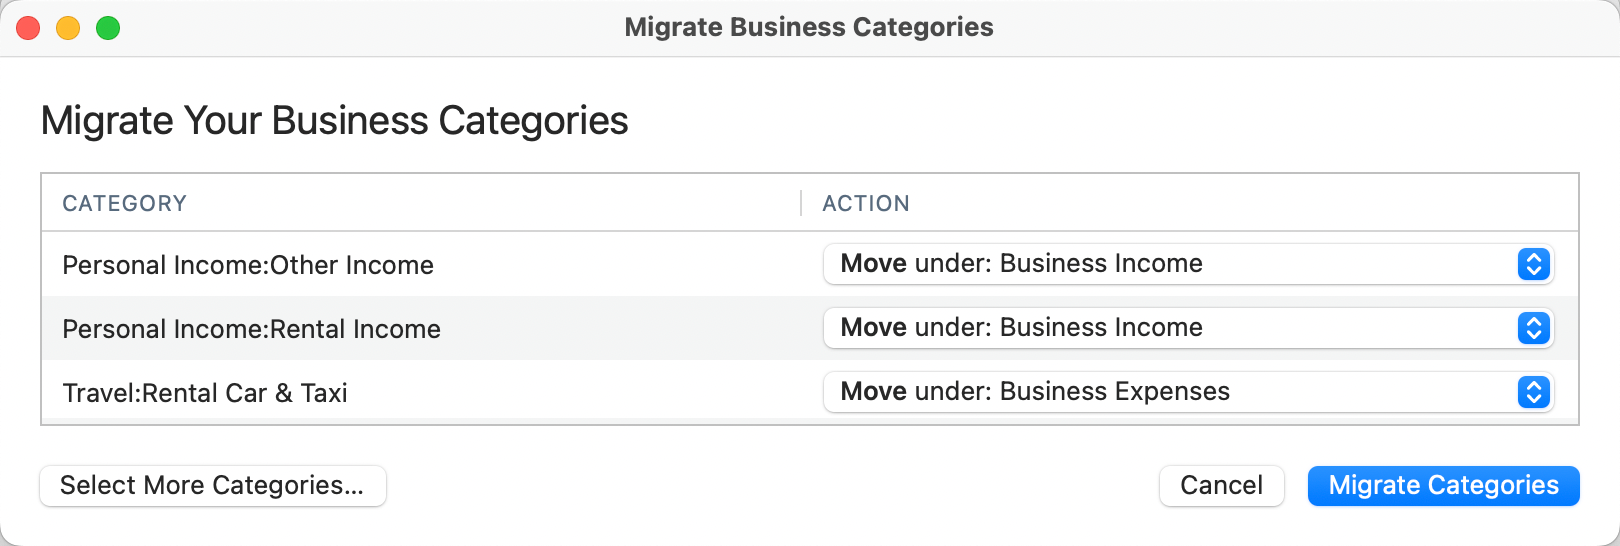
Review the list of categories and suggested Action. Make any changes you need to make. If you need to add more categories to the list, click Select More Categories in the bottom left. This can be the case if you were previously tracking business transactions with non-business categories such as Other Income or Rental Income.
-
Choose the appropriate Action for each category in the column on the right.
-
Select Migrate.