Dashboard screens
As soon as you add loan details, both the Progress and Payments views will update, and the other fields will populate (such as the monthly payment and interest rate).
NOTE: The toolbar at the bottom that is available for other features is not displayed for the loan management feature. This feature is meant to help you track how the payments are paying down a loan. You are not supposed to need to manually update any of the payment information – Quicken does that for you through your linked accounts. If your account is not linked, you can manage your scheduled transaction payments from the account you use to pay your loan.
All of these can be updated by refreshing all of your account details. You can either click on the Update All button, or you can use the three-dots dropdown menu at the top of the sidebar to refresh the data. 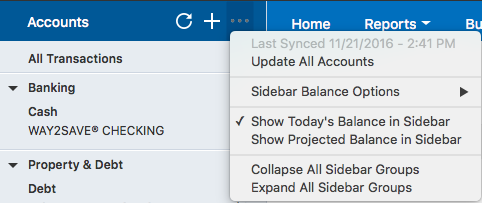
482pxLoan account header
The header gives you a few details about the loan so that you can get all of the basics about the status of your loan at a glance.
The title of the loan is in the top left. You can change it from the sidebar by right-clicking on the title there and selecting the Rename menu item.
On the right side of the header is information about your monthly payment, interest rate, and remaining balance.
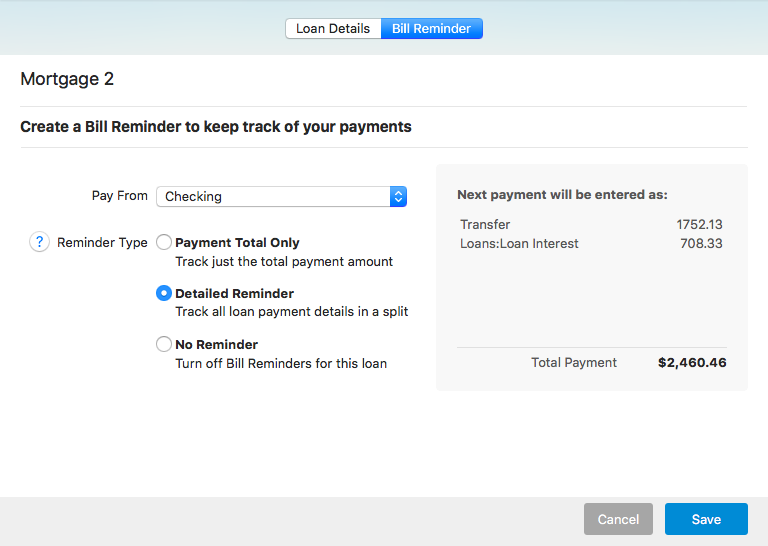
You can update your loan details by clicking on the pencil icon under the title. A sheet appears which contains two tabs where you can view details about your loan. The two tabs match the screens that you saw when you set up your loan.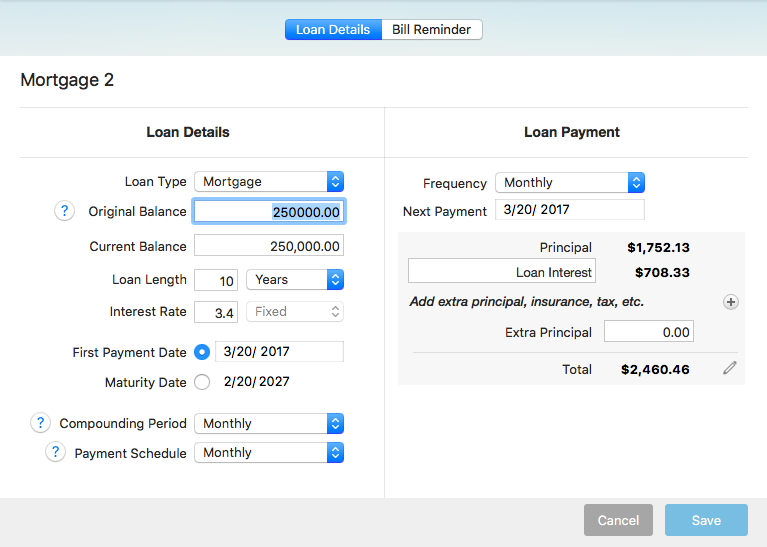
Progress view
The progress view shows the loan and how long it will take to pay it off over the life of the loan. In the beginning, it will look a little rough, but if you start to make additional payments, it will quickly start to look like you are making progress.
If you pay extra during a payment, it automatically goes to the principle if you have not specified any extras, such as insurance. Check to see how the payment counted toward your loan payment.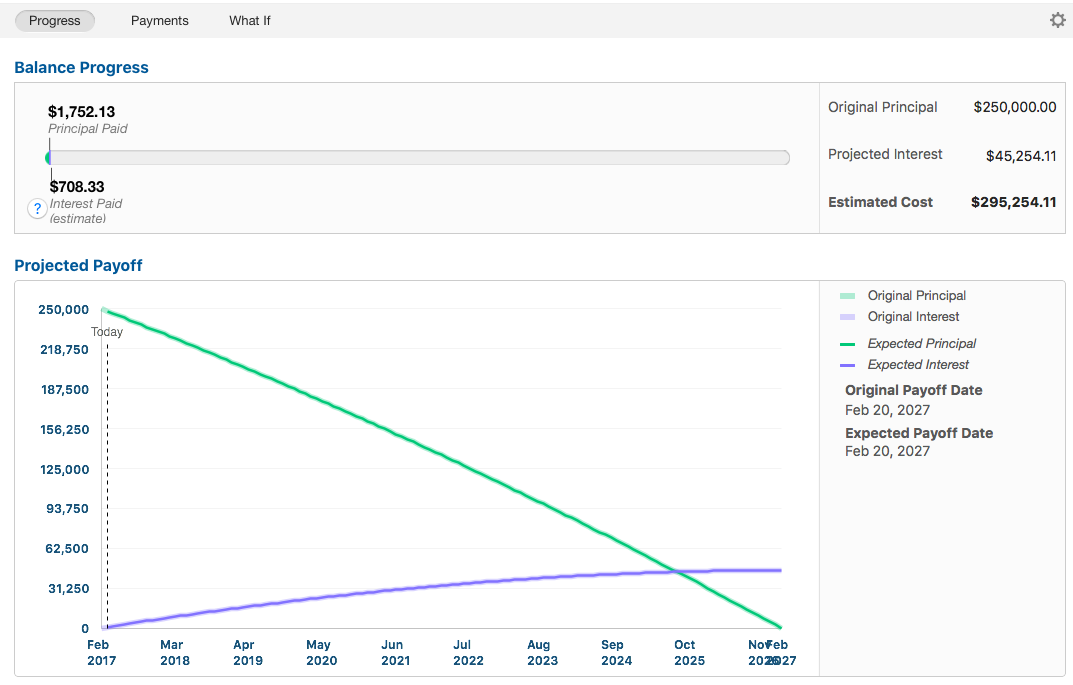
The top portion gives you a numeric value and progress bar so that you can get a quick idea of how much you have paid, how much applied to your principle, and how much went to interest.
The graph gives you a nice visual of how much you can expect to go to principal and how much will go to interest over the life of the loan. This can help you to prioritize paying off your higher-interest loans; the principle pays down faster if you make additional payments every month.
Payments screen

This view details how your payments have been applied to the loan. It also gives you more details about your payments, both past and future. The right side of the view shows the payoff date, how many payments remain before the loan is paid off (if you only pay the minimum for each payment), and a schedule for each payment based on the information you provided for your loan details. Under these details, you can see information about each payment from the account linked to make payments.
The details along the bottom of the view show you the details of each payment.
The payment date is the one you set, but you can update it if you get ahead on your payment.
The payments remaining shows how many scheduled payments you have left to make.
The View Payment Schedule button displays a separate window with details about your remaining payments. It is estimated based on the information you provided when you set up your loan, and your current balance. 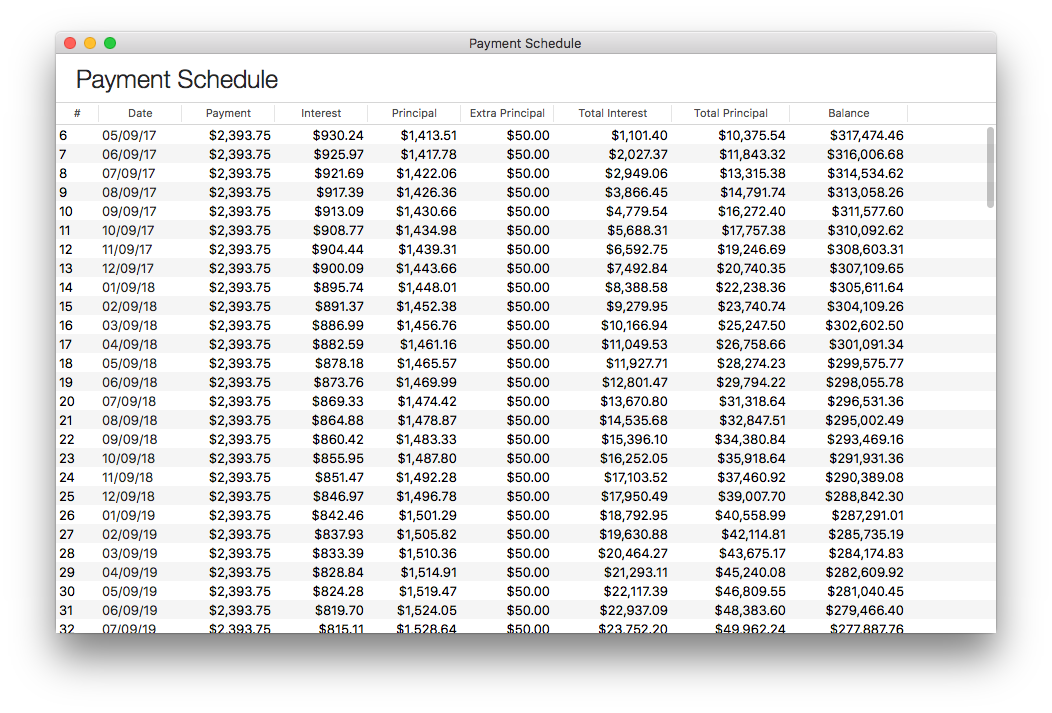
If you set up the loan as a connected account, you will have the View Bank Transactions button to show the basic payment information based on data from your financial institution.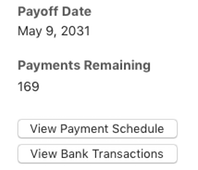
If you click the View Bank Transactions button, a window like the following is displayed so that you can review the transactions against your account. This table reflects what the bank sends Quicken – and in most cases it will not exactly match the principal and interest paid on the account. 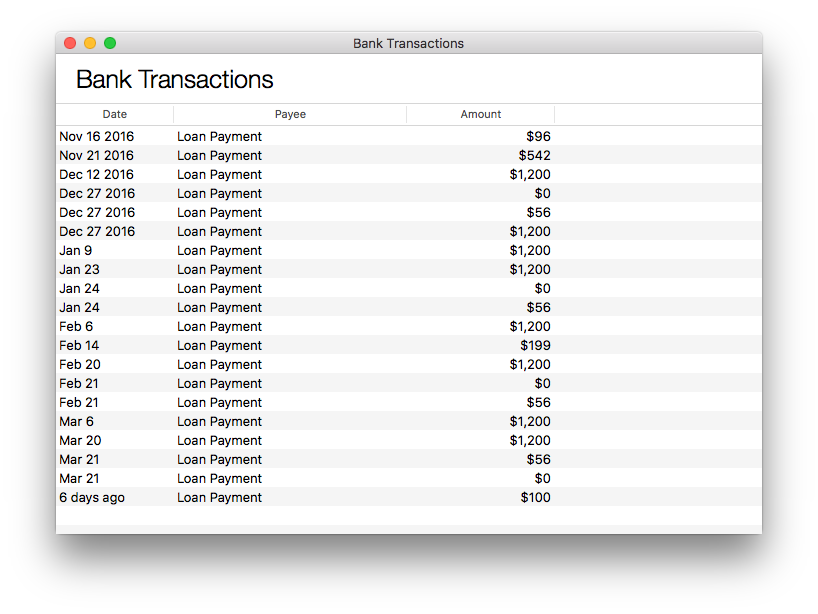
The information under the pie chart shows the balance adjustments and scheduled transactions. These act as a proxy to the payments that you make. Mark them Paid once you make the payment. A new scheduled transaction with updated principal and interest amounts are automatically generated as soon as you mark the payment Paid. If you find that you need to make changes to your payment, click the Edit Loan and Payment Terms button to make those changes.
What If view
The new What-If view is similar to the Progress view but also offers "What-If" fields that let you experiment with different payment scenarios. The three options available are:
Pay extra each payment: Calculate how increasing your regular payment would affect the Principal Payoff date and the Expected Interest Cost.
Make a one-time payment: Calculate how making a single, additional payment would affect the Principal Payoff date and the Expected Interest Cost.
Want to repay by a specific date: See how a new payoff date would affect the Expected Interest Cost and how much more would be necessary per payment to achieve payoff by that date instead.
To use this feature:
- Select a "What if I…" scenario from the dropdown menu above the graph.
- Enter the amount or date you wish to calculate.
- Click the Calculate button.
The Projected Payoff graph will update and plot your current and "What-If" loan balances over time.
The table to the right of the graph will display the estimated Interest and Time Savings. It will also display the Principal Payoff dates and Interest Costs (along with the corresponding graph lines for each item).
Notes:
No changes are made to your existing loan when you use the What-If Tool. If after using the tool you decide you want to make additional payments of principal, you'll need to change your loan payment in Quicken.
