Adding renaming rules
Quicken automatically creates a renaming rule whenever you edit a payee name in a downloaded transaction so you don't have to rename it in the future.
Renaming rules are useful to:
- Specify detailed rules for payee renaming precision.
- Define Payees that you don’t want to be renamed. The name of the Payee will stay as is when it comes from the bank.
- Sync renaming rules so that mobile and web transactions are downloaded just like they are on Mac.
- Rename existing transactions and correct past payee naming mistakes.
- View, add, modify, or delete renaming rules in the new Payees & Rules window.
To add a renaming rule from the register
- Right-click the transaction with the payee you want to change.
- Select Edit Transaction and enter the new payee name.
- Check the Also rename... option box.
- Click the dropdown arrow for more renaming options. You can select to rename future transactions or existing and future transactions.
- Press the return key.
- If you are presented with the Create Renaming Rule dialog, review and adjust your new renaming rule.
- If you have chosen to apply the rule to existing transactions, click Review. When you are done reviewing the existing transactions that will be renamed, click Apply & Save.
- If you did not choose to rename existing transactions, click Save.
Please note, the Create Renaming Rule dialog only appears during this process if Quicken anticipates that you'll want to add more details to the renaming rule. However, you can still access this dialog at any time by following the To add a renaming rule from the Payees & Rules window steps below.
Also, note that you can control whether renaming rules are automatically created by turning off the feature in the Preferences
To add a renaming rule from the Payees & Rules window
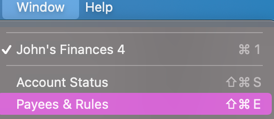
- Go to Window → Payees & Rules.

- Select the Renaming Rules tab.
- Select the + plus sign in the bottom left corner of the Renaming Rules window to create a new renaming rule.
- Review and adjust your new renaming rule.
- If you have chosen to apply the rule to existing transactions, click Review. When you are done reviewing the existing transactions that will be renamed, click Apply & Save.
- If you did not choose to rename existing transactions, click Save.
Control whether renaming rules are automatically created
- Go to Quicken → Preferences.
- Select the Register tab.
- Check or uncheck the Automatically create rule... checkbox to turn on or off automatically creating a rule in the register when editing a payee.
- Click on the drop-down to control whether the rule gets applied only to Future transactions or Existing and future transactions.
