How do I recall, edit, move, delete or export a saved report or graph?
When you recall, rename, or delete a saved report or graph, it's the report or graph definition you're recalling, renaming, or deleting (including all the settings and sort criteria that you've specified), not the data. This way, Quicken can apply the same settings to your data as it changes. Of course, if you'd like to change the data, you can always edit transactions.
Recall a saved report or graph
- Choose Reports menu > Reports & Graphs Center.
- From the My Saved Reports list on the right side of the screen, select the saved report you want. You may need to click the folder to open it and display the report you want.
- Click Show Report or Show Graph.
Move, rename, edit, or delete a saved report or graph
- Choose Reports menu > Reports & Graphs Center.
- In the lower-right corner, click Manage Saved Reports.
- Select the report you want to change. You may need to click the folder to open it and display the report you want.
- Select the appropriate option:
- To move the saved report to a different location, click Move to folder. Select a new folder or None for the report, and click OK.When you select None, Quicken puts the report at the same level as the rest of the folders instead of actually putting it in one of the folders you've created.
- To rename the saved report or change the description, click Edit, enter the new information, and click OK. You can also edit the transactions in the report.
- To delete the saved report, click Delete, confirm the deletion, and click OK.
- To move the saved report to a different location, click Move to folder. Select a new folder or None for the report, and click OK.
- Click Done.
Export report data to an Excel file
- Choose Reports menu > Reports & Graphs Center.
- From the My Saved Reports list on the right side of the screen, select the saved report you want. You may need to click the folder to open it and display the report you want.
- Click Show Report.
Click Export.
Where is the Export Data button?
Quicken displays the Export button only for reports, not graphs. You can find it at the top of your report screen.

- Choose Export to Excel Worksheet.
- In the File name field, enter a name for the file and click Save.
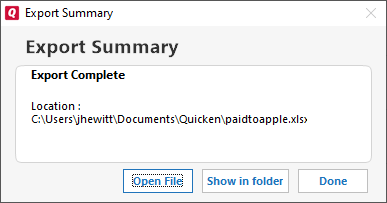
The Export Summary screen will appear with information about where your report was saved. - Quicken stores the file in the Quicken folder by default

- Switch to Excel.
- Use Excel's Open command, and navigate to the file containing your report data.
Where does Quicken put the Excel file?
Quicken stores the file in the Quicken folder by default.
Notes
If you've upgraded from a previous version of Quicken and your saved reports and graphs appear to have changed, check the date ranges for the reports. If you're using dates that don't fit one of the default date ranges, Quicken sets report and graph dates to Custom dates, and you may need to specify the appropriate dates again.
Note for our Canadian Customers
The following terms will be different in the Canadian releases of Quicken.
Canada: "Cheque" / United States: "Check"
Canada: "Colour" / United States: "Color"
Canada: "Centre" / United States: "Center"
Canada: "Realise" / United States: "Realize"
Canada: "Behaviour" / United States: "Behavior"
Canada: "Centre" / United States: "Center"
Canada: "Colour" / United States: "Color"
